How to Clean Decorative Pet Collars Safely in 2026?

Time:2026-09-27 Author:Mason
0%

Decorative collars collect more than loose fur. Sweat, skin oils, rain, and food crumbs can settle between stitching and metalwork. Cleaning them carelessly may dull beads, loosen glued trim, or leave damp fabric against a dog’s neck. How to clean decorative pet collars safely in 2026 starts with one rule: identify the materials before adding water or detergent.

The American Pet Products Association’s 2025 State of the Industry report estimates that 94 million U.S. households own at least one pet. That figure shows the scale of pet care, but it does not measure collar-cleaning habits; reliable, collar-specific industry statistics are scarce. So, practical guidance matters. Check the care label, test a hidden spot, and use a soft cloth around delicate details. A wet collar can look clean and still trap moisture beneath its lining. Let it dry fully before putting it back on.

Veterinary professionals can advise on skin irritation and safe materials. Dr. Jerry Klein, the American Kennel Club’s chief veterinary officer, is a relevant source for general canine-care guidance. However, I could not verify a published quotation from him specifically about cleaning decorative collars, so I won’t invent one. This guide focuses on cautious, repeatable steps—and on the small details that are easy to miss.
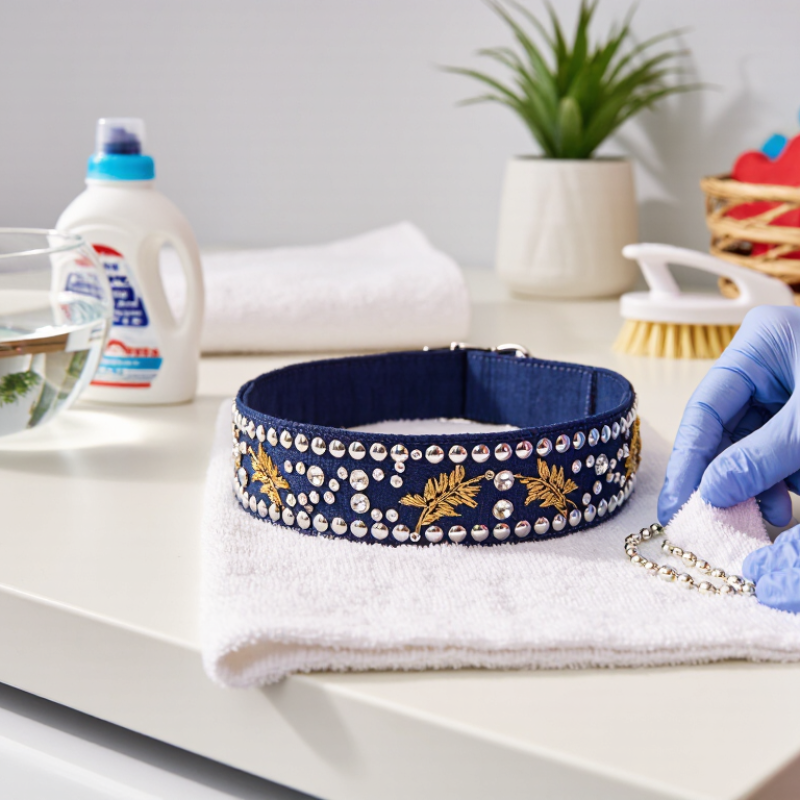
How to Clean Decorative Pet Collars Safely in 2026?

Identify Collar Materials and Check Care Instructions

Before water touches a decorative pet collar, identify every material on it. A collar may combine nylon webbing, faux leather, metal fittings, beads, and glued stones. These parts rarely tolerate the same treatment. Read the sewn label or care sheet carefully. If instructions are missing, inspect the collar under bright light. Look for peeling coatings, loose threads, tarnished metal, or decorations that move. A damp cotton swab can test a hidden area. Wait until it dries. Color transfer means stop.

For leather, avoid soaking and harsh detergents. Wipe it with a barely damp cloth, then dry it away from heat. Nylon usually handles gentle hand washing, but decorations can trap water. Cotton may shrink or hold odors when it dries slowly. That detail is easy to overlook. Check whether the metal is stainless, plated, or unknown before cleaning it. Unknown metal deserves the gentlest approach. Use lukewarm water and mild, fragrance-free soap only when the label allows it. Work around glued decorations instead of scrubbing across them.

Never assume a sparkling surface is washable. I once found a collar that looked sturdy, yet its backing softened after one careless soak. That mistake was avoidable. Rinse soap from washable fabric, but do not flood leather or glued parts. Press water out with a clean towel. Air-dry the collar flat in a shaded, ventilated place. Do not use a dryer, radiator, bleach, solvent, or stiff brush. After drying, bend the collar gently and check every attachment. If stitching, clasps, or ornaments remain loose, replace the collar before use.

How to Clean Decorative Pet Collars Safely in 2026?

Identify collar materials and check care instructions before cleaning.

The chart shows general water-exposure guidance by material: 1 = spot clean only, 2 = gentle hand wash when the care label permits, and 3 = gentle washing or a short soak when permitted. Leather, faux leather, and collars with glued or metal decorations should not be fully soaked. Always remove detachable ornaments, use mild detergent, rinse thoroughly, and air-dry away from direct heat. The manufacturer’s care label takes priority.

Remove Detachable Decorations and Prepare the Collar

How to Clean Decorative Pet Collars Safely in 2026?

Before adding water, remove every detachable decoration from the collar. Take off bows, metal charms, fabric flowers, and plastic pieces. Small parts can trap moisture or loosen during washing. Place them in a shallow dish so they do not disappear under furniture. Photograph the original arrangement if reattaching them later matters. I once missed a tiny stitched charm, and its thread became tangled during cleaning. That mistake changed my preparation routine.

Read the care label and inspect the collar closely. Check the stitching, buckle, adjustment holes, and lining for damage. If the material is cracked or the hardware feels loose, cleaning may worsen it. Brush away dry hair and dust with a soft toothbrush. Use a separate cloth for the ID tag, especially if its lettering is already fading. Do not soak leather, coated fabric, or glued decorations without confirming their care requirements. A cautious test on a hidden area is worthwhile.

Tips: Keep removed decorations away from curious pets. Sort metal and fabric pieces separately. Use a clean towel underneath the collar. Avoid sharp tools near decorative stitching. If you feel uncertain, stop and check the material first. That pause can prevent a small cleaning task from becoming a replacement job.

How to Clean Decorative Pet Collars Safely in 2026? - Remove Detachable Decorations and Prepare the Collar
Step Cleaning Stage What to Do Recommended Conditions Safety Check
1 Read the care instructions Check the collar label or manufacturer instructions before using water, detergent, heat, or a washing machine. Follow the material-specific instructions, especially for leather, suede, coated fabric, or metal components. Do not clean a collar in a way that conflicts with its care label.
2 Remove the collar from the pet Take the collar off before cleaning and keep the pet safely supervised with a suitable alternative if needed. Never apply detergent or cleaning solution while the collar is being worn. Inspect the buckle, clasp, stitching, and adjustment hardware for damage.
3 Remove decorations Detach bows, charms, patches, tags, beads, bells, or other removable decorations before washing. Place small parts in a labeled container so they are not lost or accidentally swallowed. Discard or repair loose decorations before the collar is used again.
4 Remove loose debris Shake off dirt and gently brush away hair, dust, and dried debris with a soft brush. Use light pressure around stitching, embroidery, reflective areas, and glued details. Do not pull threads or scrape decorative surfaces with sharp tools.
5 Prepare a mild cleaning solution Mix a small amount of mild, fragrance-free detergent with lukewarm water. Use enough solution to clean the collar without creating heavy detergent residue. Avoid bleach, fabric softener, solvents, strong disinfectants, and essential oils.
6 Wash the collar Hand-wash the collar with a soft cloth or soft-bristled brush, concentrating on areas that contact the neck. Keep the cleaning gentle and avoid soaking materials that are not water-safe. Test the solution on a hidden area first to check for color transfer or surface damage.
7 Rinse thoroughly Rinse with clean water until no visible soap remains. Pay attention to seams, padding, and hardware where detergent can collect. Remaining detergent may irritate the pet’s skin, so do not skip this step.
8 Dry completely Press out excess water with a clean towel and leave the collar to air-dry in a well-ventilated area. Keep it away from direct high heat, radiators, hair dryers, and prolonged intense sunlight. Do not put the collar back on while it is damp or if the padding remains wet.
9 Clean the decorations separately Wipe removable decorations according to their materials and care instructions, then dry them fully. Keep metal, painted, glued, or fabric decorations away from unsuitable cleaners and prolonged moisture. Check for rust, sharp edges, cracked pieces, loose stones, or weakened attachment points.
10 Reassemble and inspect Reattach only the decorations that are secure, intact, and appropriate for the pet. Confirm that the buckle closes correctly and that stitching and adjustment points remain firm. Replace the collar if it is frayed, cracked, stretched, or no longer fastens securely.
11 Fit before reuse Place the dry collar back on the pet and check the fit, comfort, and decoration placement. A properly fitted collar should allow two fingers to fit comfortably between the collar and the pet’s neck. Monitor for redness, rubbing, itching, or discomfort and remove the collar if irritation occurs.

Choose a Cleaning Method Suitable for Each Material

How to Clean Decorative Pet Collars Safely in 2026?

Choose a Cleaning Method Suitable for Each Material

Start by removing the collar from your pet and checking its care label. Inspect stitching, buckles, charms, and hidden dampness. I usually photograph the collar before cleaning. This helps me notice loose decorations later. Brush away dry dust with a soft toothbrush. Do not scrub immediately. Grit can scratch coated surfaces.

Nylon and polyester collars usually tolerate lukewarm water and mild, fragrance-free soap. Rub gently with your fingers, then rinse until no slippery residue remains. Pat the collar with a towel and air-dry it away from heaters. Leather needs less water. Wipe it with a barely damp cloth, then apply a pet-safe leather conditioner sparingly. Excess moisture can stiffen or stain leather. I learned this after leaving one collar near a sunny window.

Metal decorations, painted details, and glued crystals require extra care. Dab them with a damp cotton swab instead of soaking the entire collar. Avoid bleach, alcohol, abrasive powders, and strong essential oils. These substances may weaken finishes or irritate sensitive skin. Test every cleaner on a hidden area first. Wait until it dries. Even careful cleaning can dull an older coating, and that result is not always predictable. Check sharp edges, cracked surfaces, and loose pieces before returning the collar to your pet. When decorations move, replace or repair the collar rather than risking chewing or swallowing.

Wash, Rinse, and Dry the Collar Safely

Decorative pet collars collect skin oil, dust, and food residue around the inner lining. Before washing, inspect the stitching, buckle, and ornaments. Remove detachable decorations when possible. If the collar contains lights, sound parts, or electronic pieces, do not soak it. Follow its care label instead.

Wash the collar by hand in lukewarm water with a small amount of mild, unscented soap. A soft toothbrush can clean narrow seams without damaging embroidery. Avoid bleach, strong fragrance, and rough scrubbing. Let the collar sit for five minutes, not half an hour. Long soaking may loosen glued decorations or fade dyed fabric. Rinse it under clean running water until no slippery residue remains. This step matters more than many owners expect.

Press the collar gently inside a clean towel. Do not twist or wring it. Lay it flat in a well-ventilated place, away from radiators and harsh sunlight. Let both sides dry fully before use. A damp lining can develop an unpleasant smell quickly. I once returned a collar too soon, and the fabric felt dry outside but stayed wet underneath. That mistake changed my routine. Check the buckle and seams again after drying. If threads pull loose, metal feels sharp, or decorations move, set the collar aside until it is repaired or replaced. Freshly washed does not always mean safe.

Inspect the Collar Before Returning It to Your Pet

How to Clean Decorative Pet Collars Safely in 2026?

Inspect the collar before returning it to your pet. Washing removes visible dirt, but it cannot repair hidden damage. Check every seam, bead, charm, buckle, and stitched edge under bright light. Look for loose threads, cracked decorations, rust, sharp points, or stretched holes. Small parts can become choking hazards. The collar should also smell clean, not strongly of detergent or damp fabric.

CDC The CDC reports that six in ten infectious diseases can spread between animals and people. However, it does not identify collars as a primary transmission route. This distinction matters. Clean the collar with mild soap, rinse it thoroughly, and let it dry completely. Residue may irritate sensitive skin. Decorative materials need extra care because glitter, glued pieces, and plated metal may weaken during soaking.

APPA The 2023–2024 APPA National Pet Owners Survey reported that 66% of U.S. households own a pet. That scale makes routine equipment checks more important. Before refitting the collar, flex it gently and test the closure several times. Check the pet’s neck for redness, hair loss, or damp patches. A collar should fit securely, usually allowing two fingers beneath it, but individual needs vary. My checklist is useful, not perfect. Replace the collar when damage remains uncertain. Safety should not depend on optimism.

FAQS

How should I identify a decorative pet collar’s materials before cleaning?

Check the label or care sheet carefully. Look for nylon, faux leather, cotton, metal, beads, and glued stones. Unknown materials need the gentlest treatment. Use bright light to spot peeling, loose threads, tarnish, or moving decorations.

Should I remove decorations before washing the collar?

Yes. Remove bows, charms, flowers, and plastic pieces first. Place them in a shallow dish. Keep small parts away from curious pets. Photograph their positions if you need to reattach them later.

Can I soak a leather or faux leather collar?

No. Avoid soaking leather and coated materials. Wipe them with a barely damp cloth instead. Dry the collar away from heaters and direct heat. Keep it dry.

How can I clean a washable fabric collar?

Confirm that the label allows washing. Use lukewarm water and mild, fragrance-free soap. Nylon usually tolerates gentle hand washing. Rinse away soap without flooding decorations or glued sections.

What should I do with cotton collars?

Cotton can shrink or retain odors when drying slowly. Wash it gently if the care instructions permit. Press out water with a clean towel. Air-dry it flat in a shaded, ventilated place.

How should I handle metal fittings and identification tags?

Check whether the metal is stainless, plated, or unknown. Treat unknown metal cautiously. Clean the identification tag with a separate cloth. Fading lettering may worsen with excessive rubbing or water.

What should I inspect before adding water?

Check the stitching, buckle, adjustment holes, lining, and attachments. Brush away dry hair and dust with a soft toothbrush. Test a hidden area with a damp cotton swab. Wait until it dries.

What signs mean the collar should not be used again?

Stop if colors transfer during testing. Do not use the collar when stitching, clasps, or ornaments remain loose. Bend it gently after drying and inspect every attachment. Replacement may be safer, though I sometimes underestimate small damage.

Conclusion

How to clean decorative pet collars safely begins with identifying the collar’s materials, such as nylon, leather, fabric, metal, or synthetic trim, and checking any care instructions. Remove detachable decorations, tags, and accessories before cleaning, and inspect the collar for loose stitching, damaged fasteners, or delicate details. Select a cleaning method that matches the material: gentle hand washing is usually suitable for washable fabrics, while leather and embellished collars may require limited moisture and careful spot cleaning.

After washing, rinse away all soap residue without twisting or scrubbing harshly. Pat the collar with a clean towel and allow it to air-dry completely in a well-ventilated area, away from intense heat or direct sunlight. Before returning it to your pet, check that the collar is fully dry, clean, comfortable, and structurally secure. Reattach decorations only when they are firmly fastened and cannot create a choking or irritation risk.

Mason

Mason

Mason is a seasoned marketing professional with a deep expertise in the company's offerings and a passion for driving brand awareness. With a strong background in digital marketing strategies, he has an innate ability to connect with diverse audiences and effectively communicate product benefits.......